


How to Set Up Permissions for Agile Resource Management
Introduction
This guide explains how to give users access to Agile Resource Management in Easy8 by adjusting their roles and permissions.
Target Audience
Administrator
Prerequisites
- Admin rights to access global Roles and permissions
- Agile Resource Management already installed and visible in the global menu
Steps to Set Up Permissions
Step 1: Open Roles and Permissions
- Go to Administration >> Roles and permissions
- Choose the role you want to update (e.g., Project Manager, Developer)
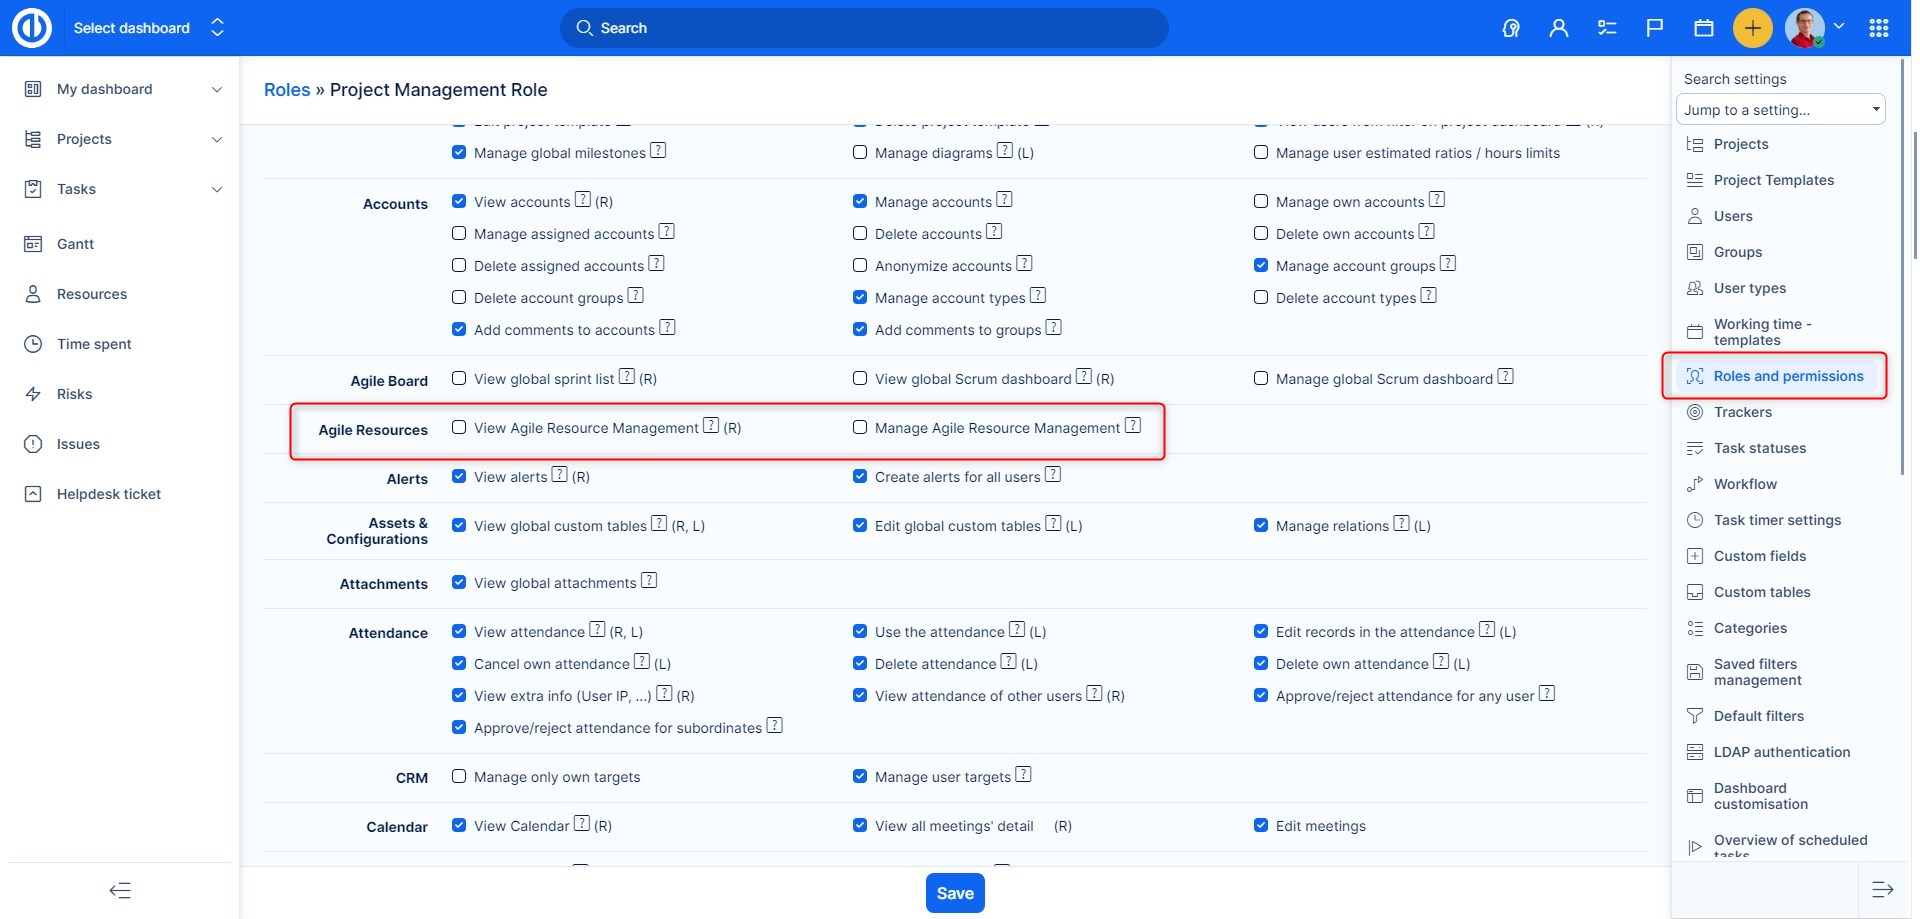
Step 2: Find the Agile Resources Section
- Scroll to the Agile Resources section under Global permissions
- You will see two checkboxes:
- View Agile Resource Management – allows the user to see Agile timelines and team assignments
- Manage Agile Resource Management – allows the user to make changes such as adding workers and editing events
Step 3: Set the Right Access
- Enable View permission for users who only need to monitor Agile Resources
- Enable Manage permission for users responsible for active planning, assigning resources, and updating allocations
🛈 Tip: Use \"View\" for observers and team members; use \"Manage\" for team leads and project managers
Step 4: Save the Role
- Scroll down and click Save
- The updated role permissions will now apply to all users assigned to this role
Conclusion
Setting proper permissions is key to using Agile Resource Management effectively. Make sure that each role has only the level of access it needs — either to view or manage Agile resources. This helps protect planning accuracy while giving planners full control.
This ensures the right users can access and use Agile planning features according to their role in the organization.
| How would you rate this article? | |||
|


