


Introduction
This guide shows you how to customize a dashboard in Easy8. Dashboard customization helps you adjust the layout, content, and widgets to match your needs. By customizing dashboards, you can view the most important data in a way that works best for you or your team.
Target Audience
- User
- Administrator
Prerequisites
- Access to an existing dashboard
- Permission to customize the dashboard (granted to users by Administrator via User Role)
How to Customize a Dashboard
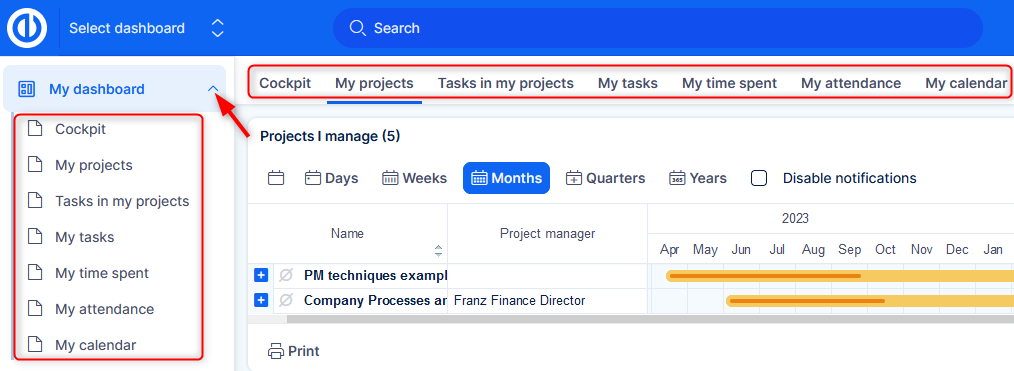
Step 1: Open the Dashboard
Go to the dashboard you want to customize.
Dashboards can be found under the Dashboard List or linked from other modules.
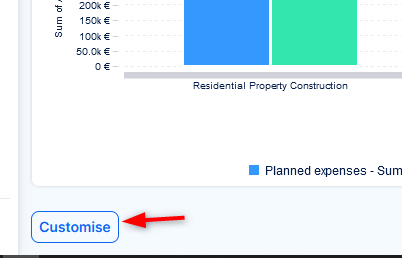
Step 2: Click the Customise Button
Down left of the dashboard, click the Customise button.
This opens the edit mode, where you can change the layout and widgets.
Note: Only users with edit permission will see the Customise button.
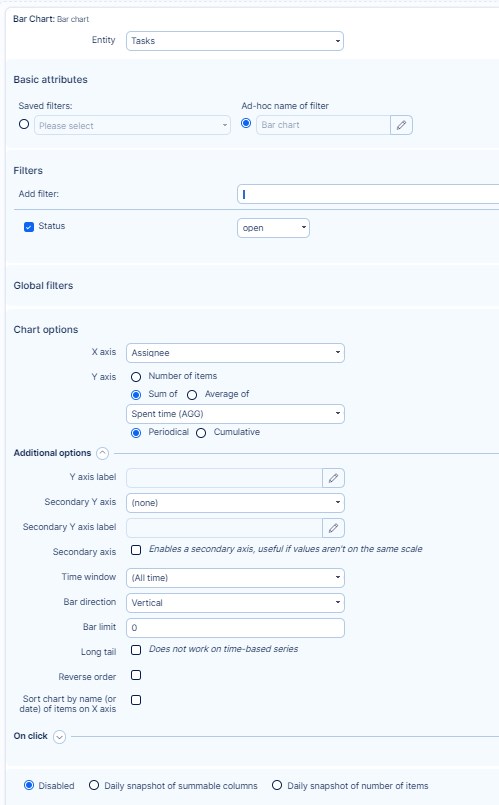
Step 3: Add or Remove Widgets
- To add a widget, use the widget panel that appears in edit mode at the top.
- Select the widget type (e.g., bar chart, pie chart, time series, gauge).
- Configure its settings and click to place it on the dashboard - see the related Understanding Dashboard Widget Filters article for information on the configuration options.
- To remove a widget, click the widget’s options (three dots) and choose delete.
- You can also clone an existing widget through the options.
Step 4: Rearrange Layout
- You can drag and drop widgets to different positions.
- Some dashboards have two columns, sidebars, headers, or footers depending on the layout type.
- Adjust placement for better visibility and focus.
- You can also click the Add tab option at the top to create a new tab on the board. You can create as many tabs as you need.
Step 5: Save Changes
Once your changes are done, click Save and go back.
Your new dashboard layout will now be active.
Conclusion
You have now customized your dashboard in Easy8. This allows you to focus on the most relevant data and improve your workflow based on real-time visual insights.

