


Introduction
This guide will show you how to use the Quick Project Planning module in Easy8 to create tasks. This feature helps you quickly define project structure, plan workload, and get an overview of what needs to be done. It’s especially useful at the beginning of a project.
Target Audience
- Project Managers
- Team Leaders
Prerequisites
Before starting, ensure you have:
- Project access with permission to manage tasks.
- The Quick Project Planning module enabled in your project settings.
How to Set Up Tasks
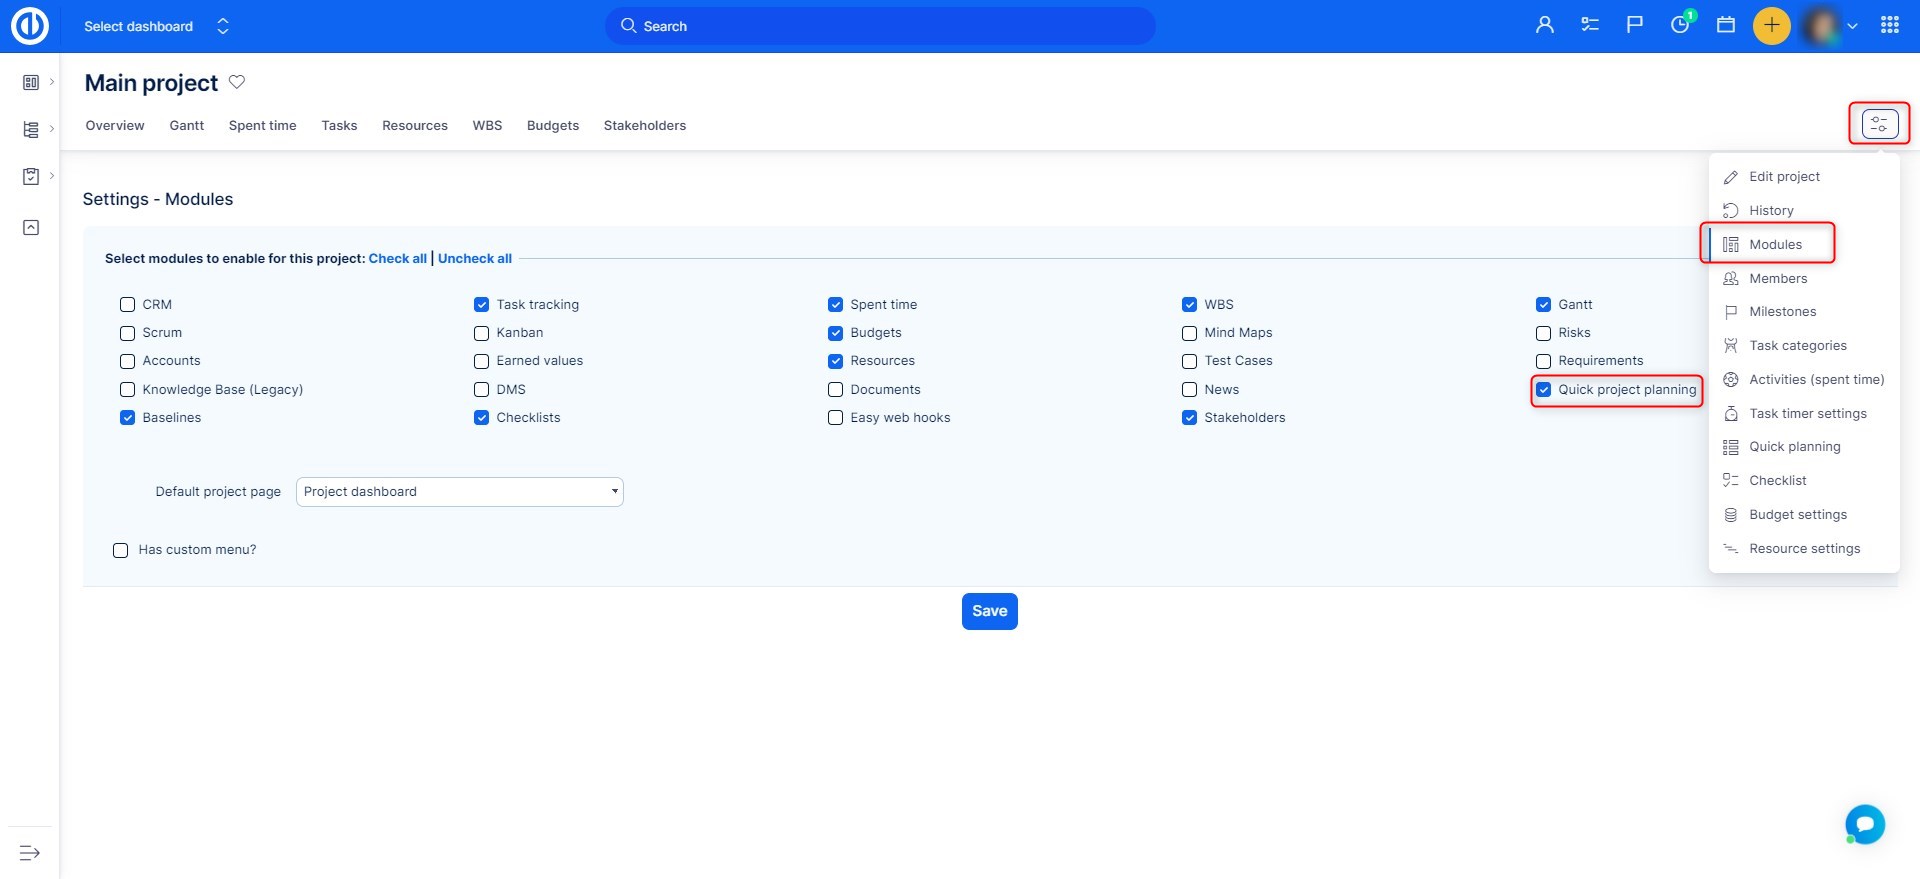
Step 1: Enable Quick Project Planning Module
- Open the specific project.
- Go to Settings > Modules.
- Check the box for Quick Project Planning.
- Click Save.
- A new Quick Project Planning option will appear in the project right side bar.
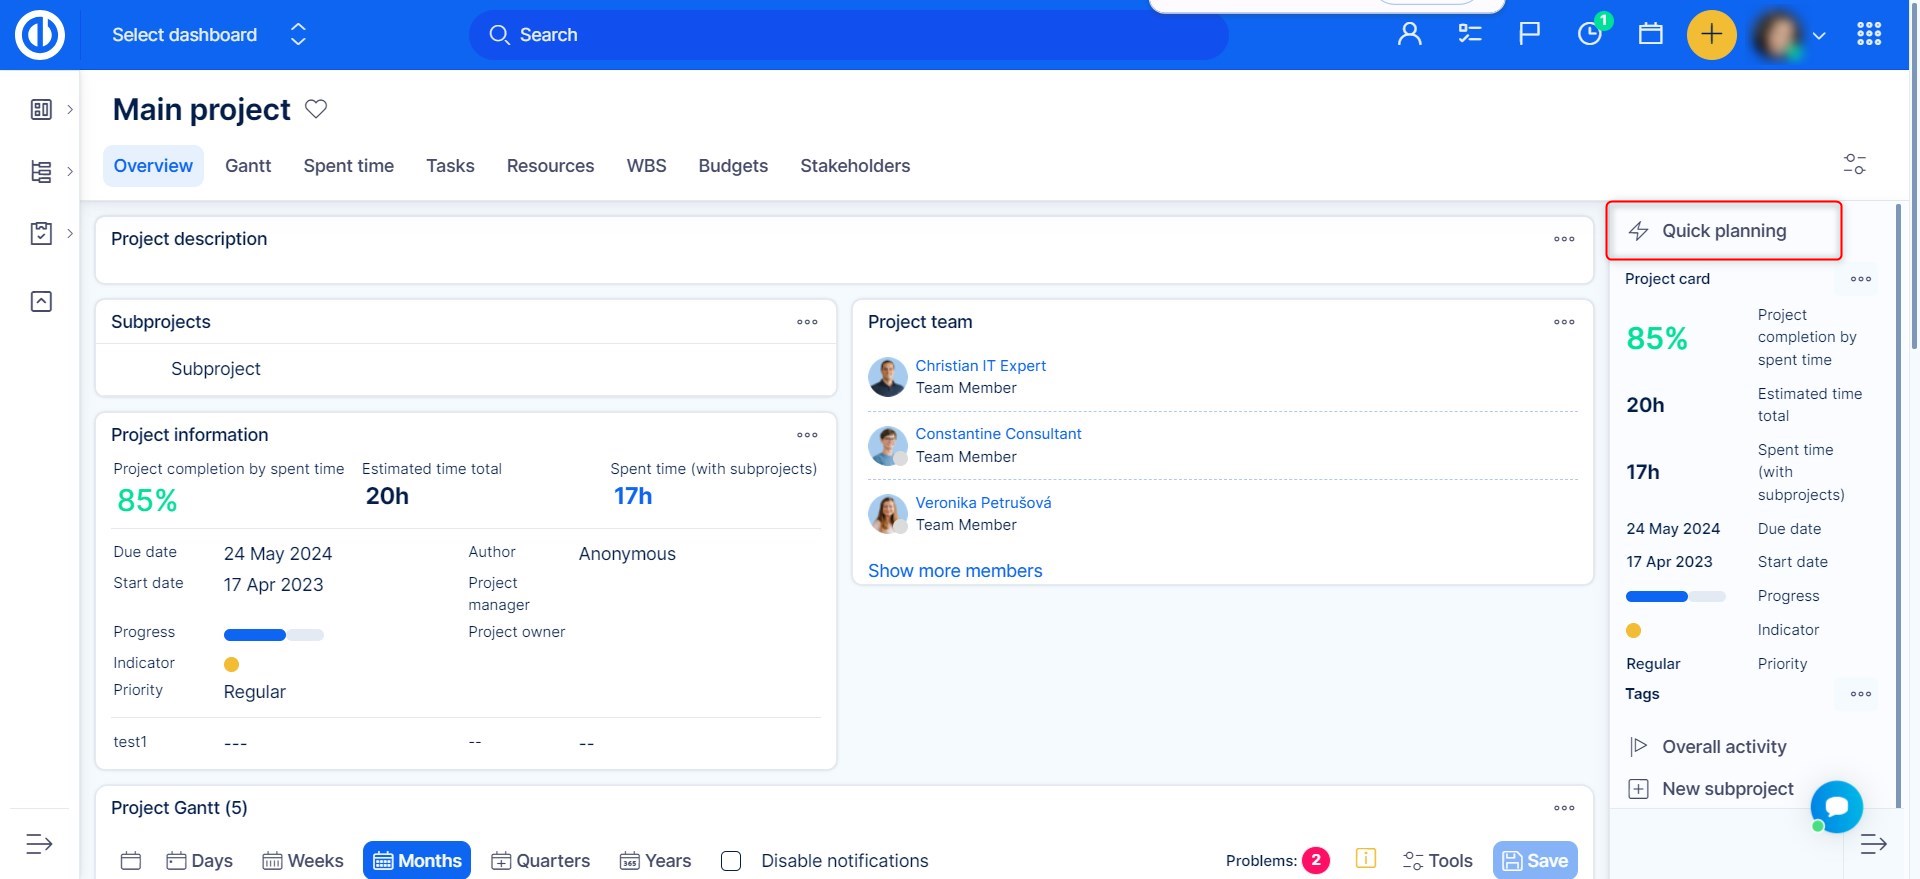
Step 2: Open the Quick Project Planning Interface
- Click the Quick Project Planning option from the project Dashboard.
- You’ll see a simple, spreadsheet-style layout for adding tasks and milestones.
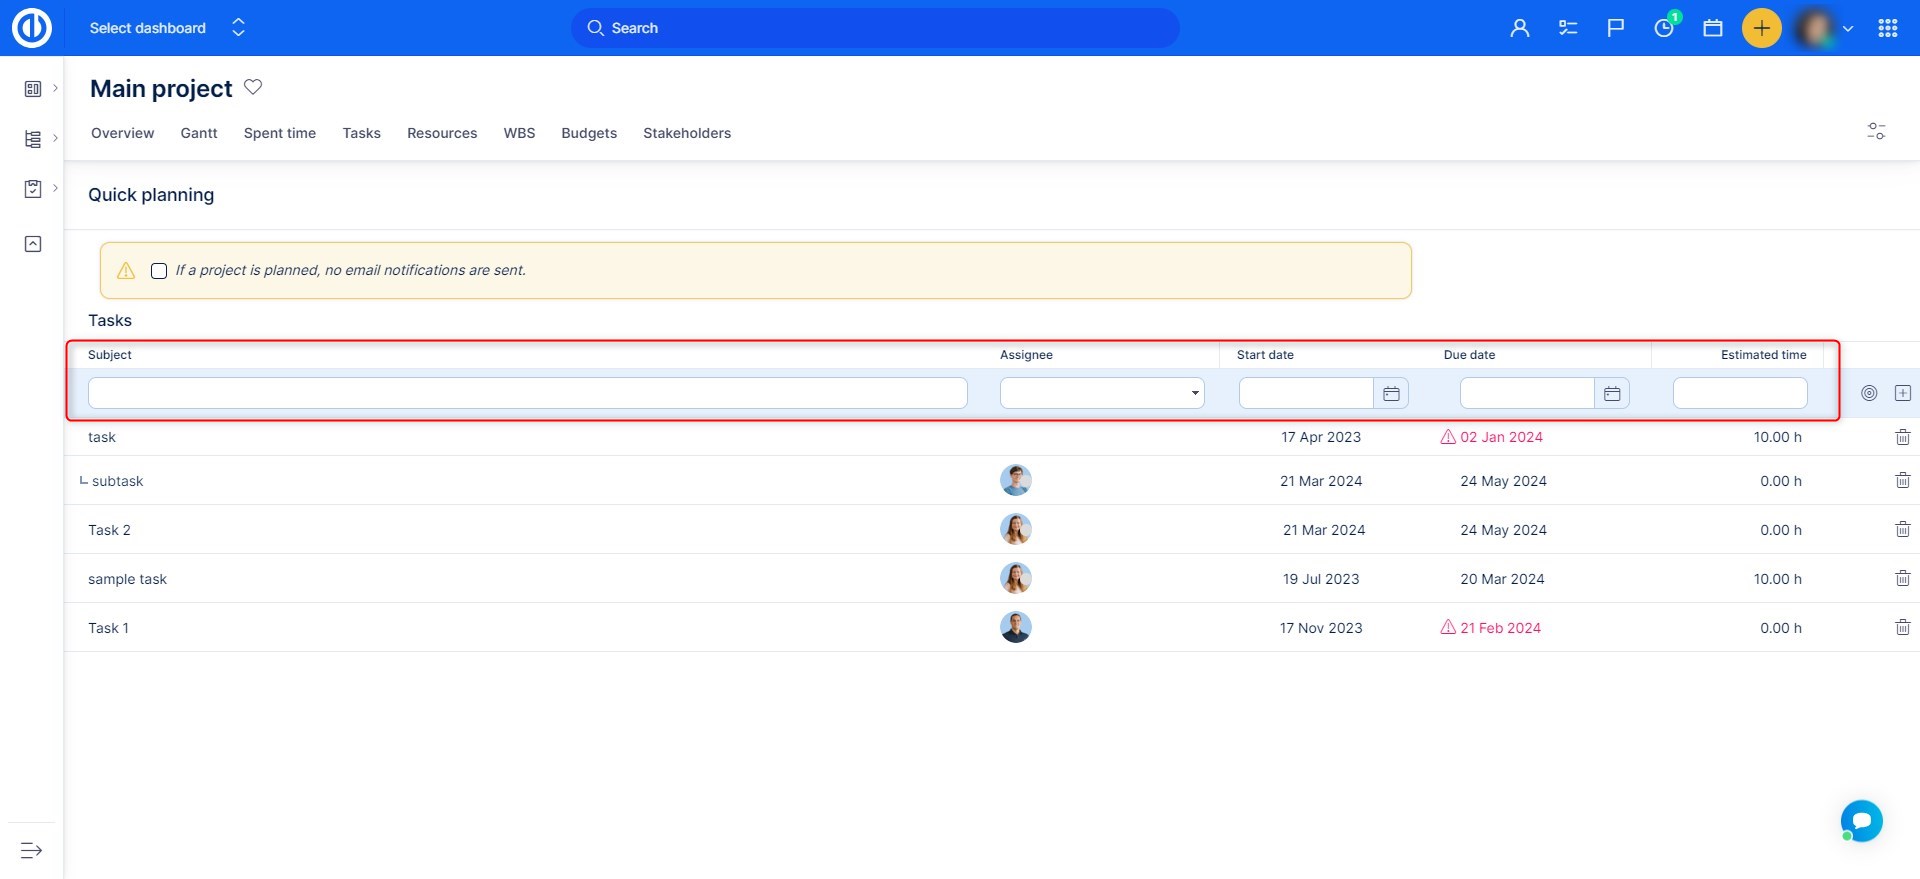
Step 3: Add Tasks
- In the table, enter the task name in the Subject column.
- Define:
- Assignee
- Start date
- Due date
- Estimated time
- Press Enter or click Add to save the task.
This way you can created multiple tasks in rapid succession without opening the individual task forms.
Step 4: Add Details
- In the same interface, click the Other Fields option at the end of the row.
- The full task form will open in an overlay window.
- Specify all the required details at the moment you are creating the task or come back to the task later.
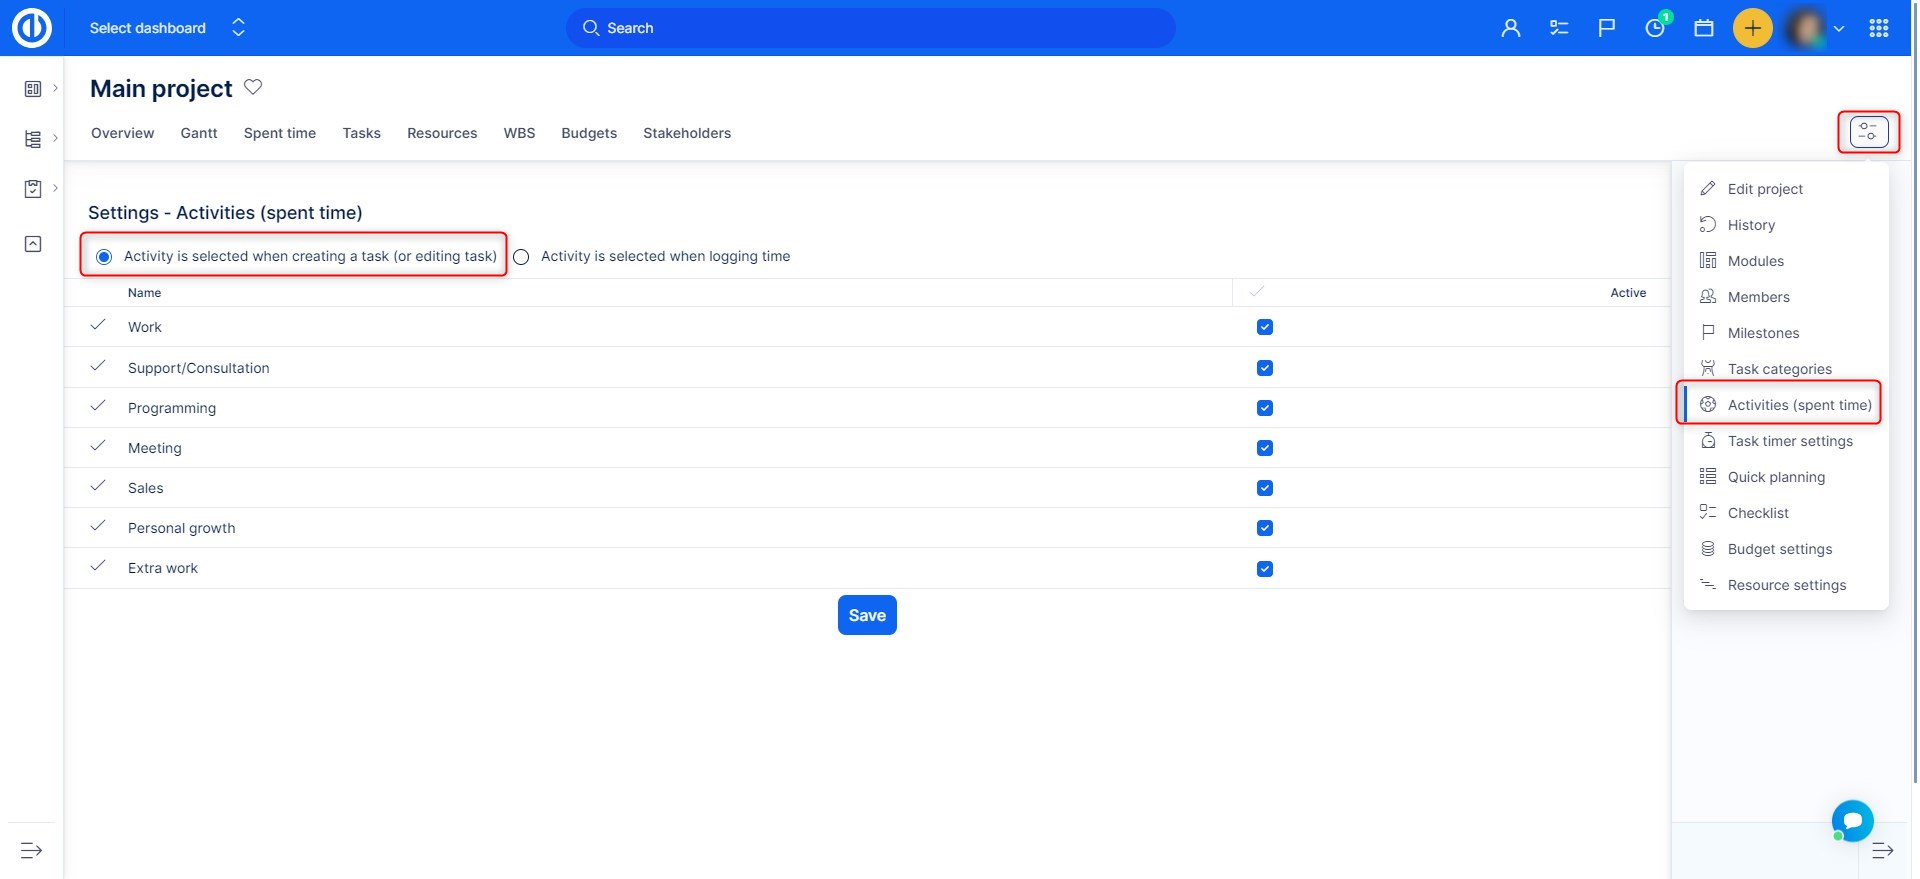
Note that every time you create a new task, all required custom fields and standard fields must be filled in, even in the Quick Project Planning. If they are not filled in, an error message will show up. Special caution should be taken when there is active option Activity is pre-selected when creating a task in project's Settings > Activites (time tracking) as illustrated below. In such a case, the activity field is always required field when creating a new task.
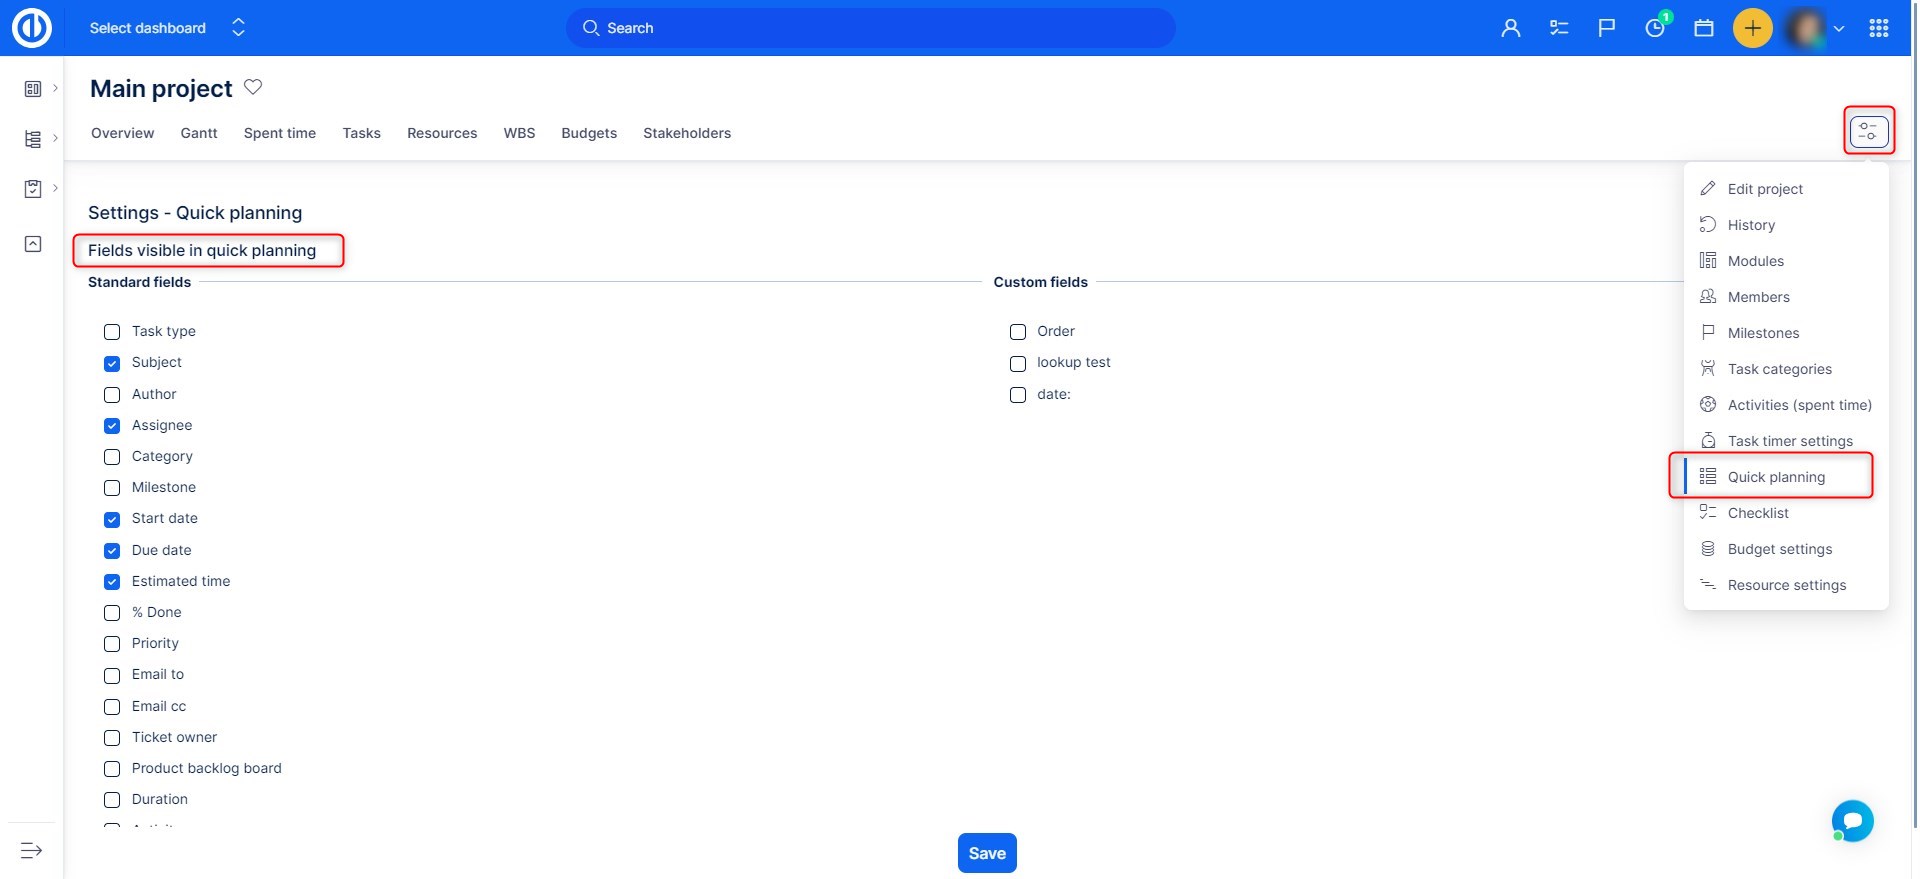
To select which columns are required to fill in when using the Quick planning, navigate to project's Settings >> Quick planning >> Fields visible in quick planning, where you can choose from both standard fields and custom fields. We recommend selecting just about 3 columns co that the Quick planning actually fulfills its purpose, to remain quick and simple.
Step 5: Review and Adjust
- Tasks created here are visible in other modules, such as Gantt Chart, Work Breakdown Structure or Task List.
Troubleshooting
- If the Quick Project Planning tab is missing, confirm the module is enabled under project settings.
- Ensure you have permission to create tasks and milestones in the project.
Conclusion
You have successfully used the Quick Project Planning feature to set up tasks in Easy8. This fast and intuitive tool helps you begin project execution with a clear and structured plan.

