


Introduction
Project templates in Easy8 allow you to save time by reusing predefined project structures. You can create a template from any existing project and then use it to quickly generate new projects with the same settings, tasks, and data. This guide explains how to create a project template and where to manage it.
Target Audience
- Administrators
Prerequisites
Before creating a project template, make sure you have:
- A project that is fully set up with tasks, milestones, and desired configurations.
- Access to the Administration section.
How to Create a Project Template
Step 1: Prepare the Source Project
- Open the project you want to save as a template.
- Ensure the project contains all necessary structure and data (tasks, settings, roles, widgets, etc.).
- Double-check that task dates and assignments are complete if you want them reflected in future projects.
Step 2: Create the Template
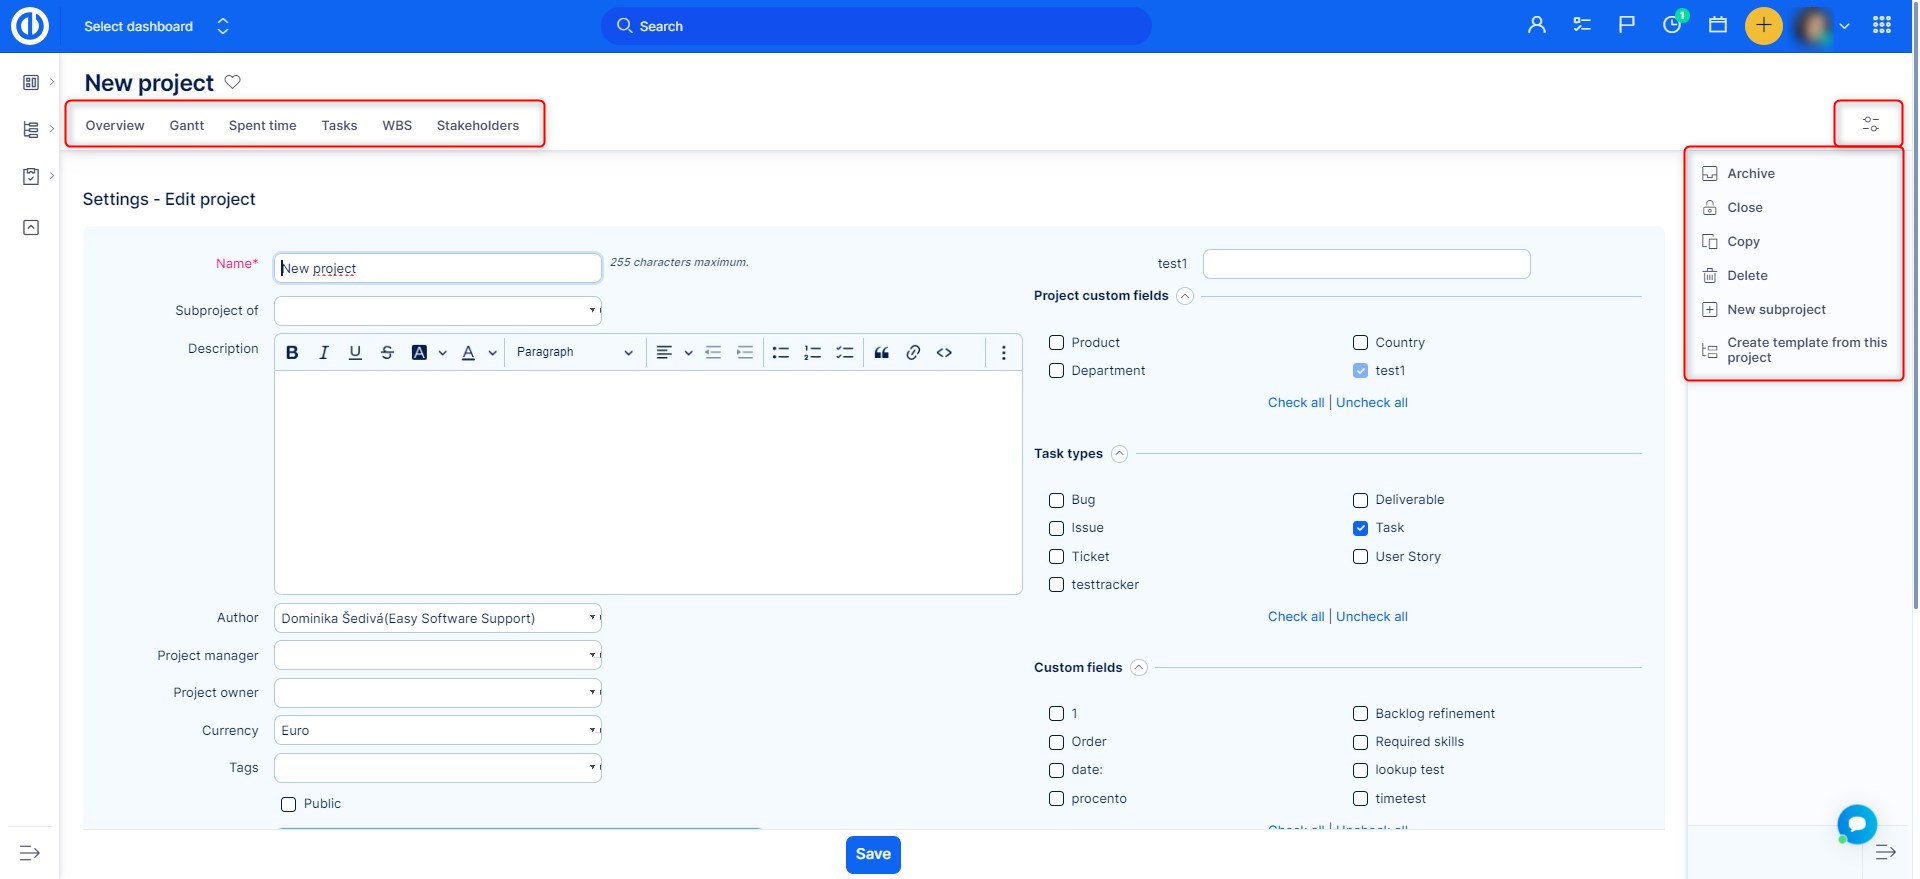
- In the project overview click the project settings icon top right and choose to Edit Project.
- On the settings page that loads click the Create template from this project in the right side bar.
- The project will now appear in the list under Administration > Project templates.
This saves the project with all its elements, so you can reuse it as needed.
Managing Project Templates
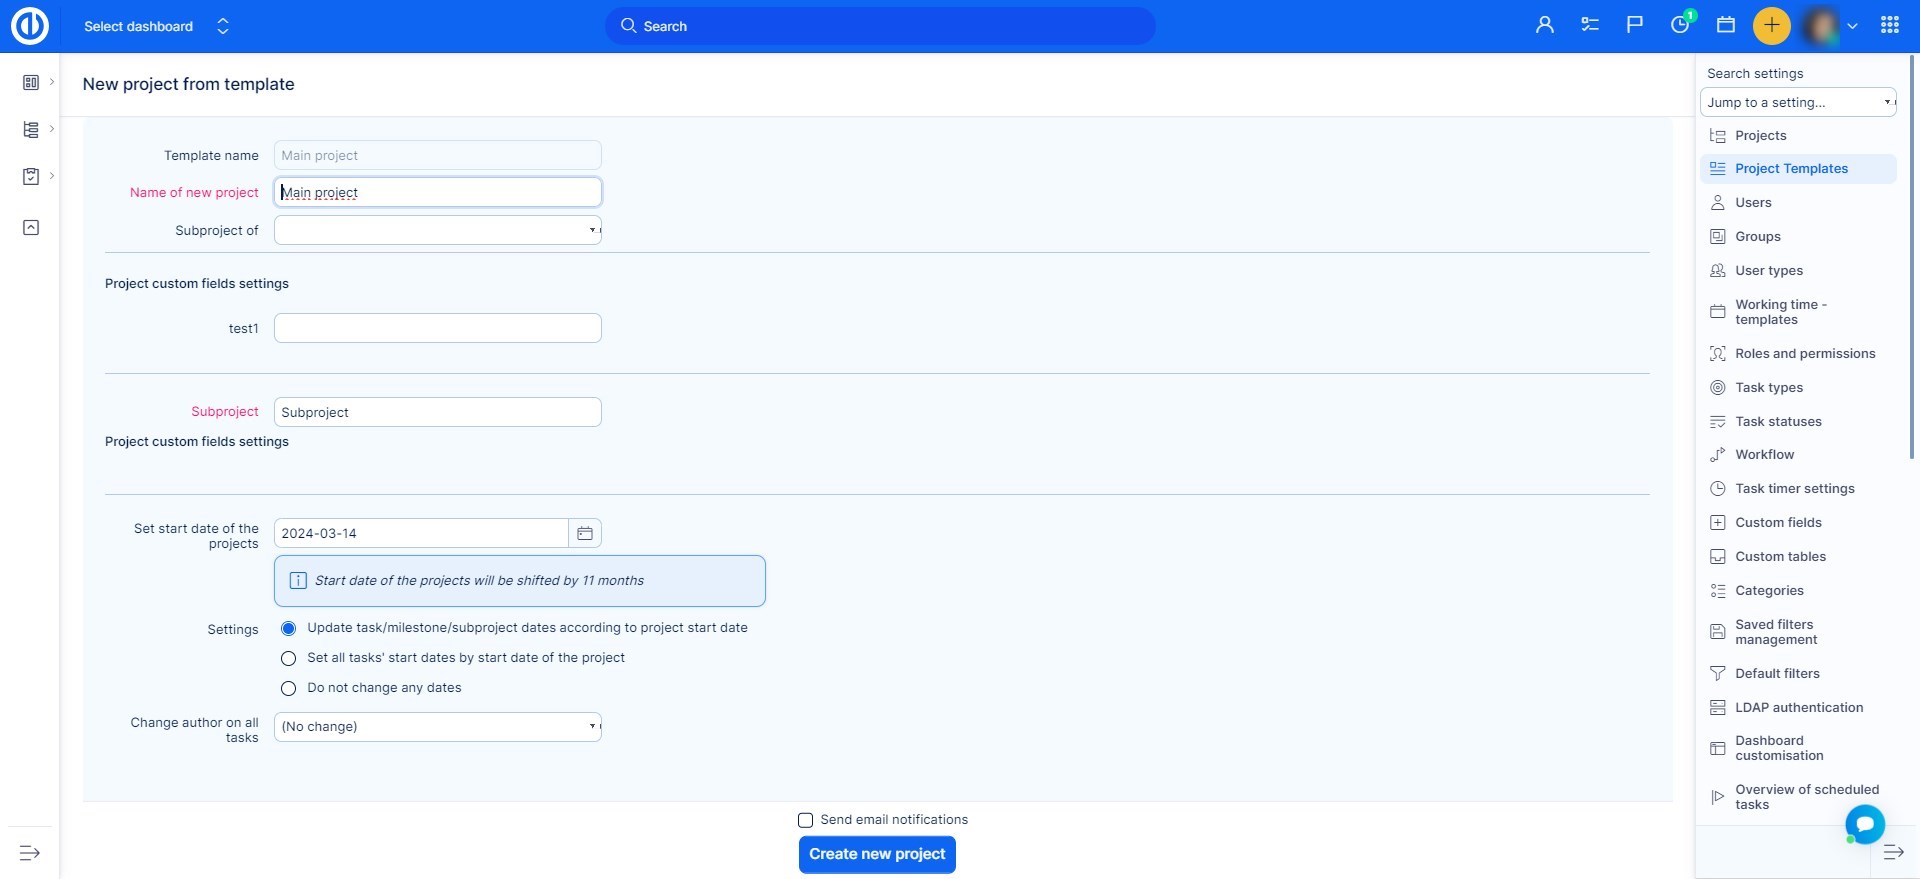
- Go to Global Menu > Administration > Project templates.
- Here, you can:
- View all saved templates.
- Use the icons on the right side to:
- Create a new project from the template.
- Copy the template into an existing project.
- Edit or Delete the template.
Conclusion
Creating a project template in Easy8 is a fast and efficient way to standardize your workflow. Once set up, templates allow you to launch new projects with consistent structure, roles, and data—saving time and reducing setup errors.
Further Reading
Related articles

